Translations
Manage all your application's translation strings in one place — across every locale, with team collaboration and auto-translation support.
Localess Translations lets you manage your application's UI strings as structured key–value pairs, each supporting multiple locales. The data is served over the API as a flat JSON map, ready to drop into any i18n library.
Main Screen
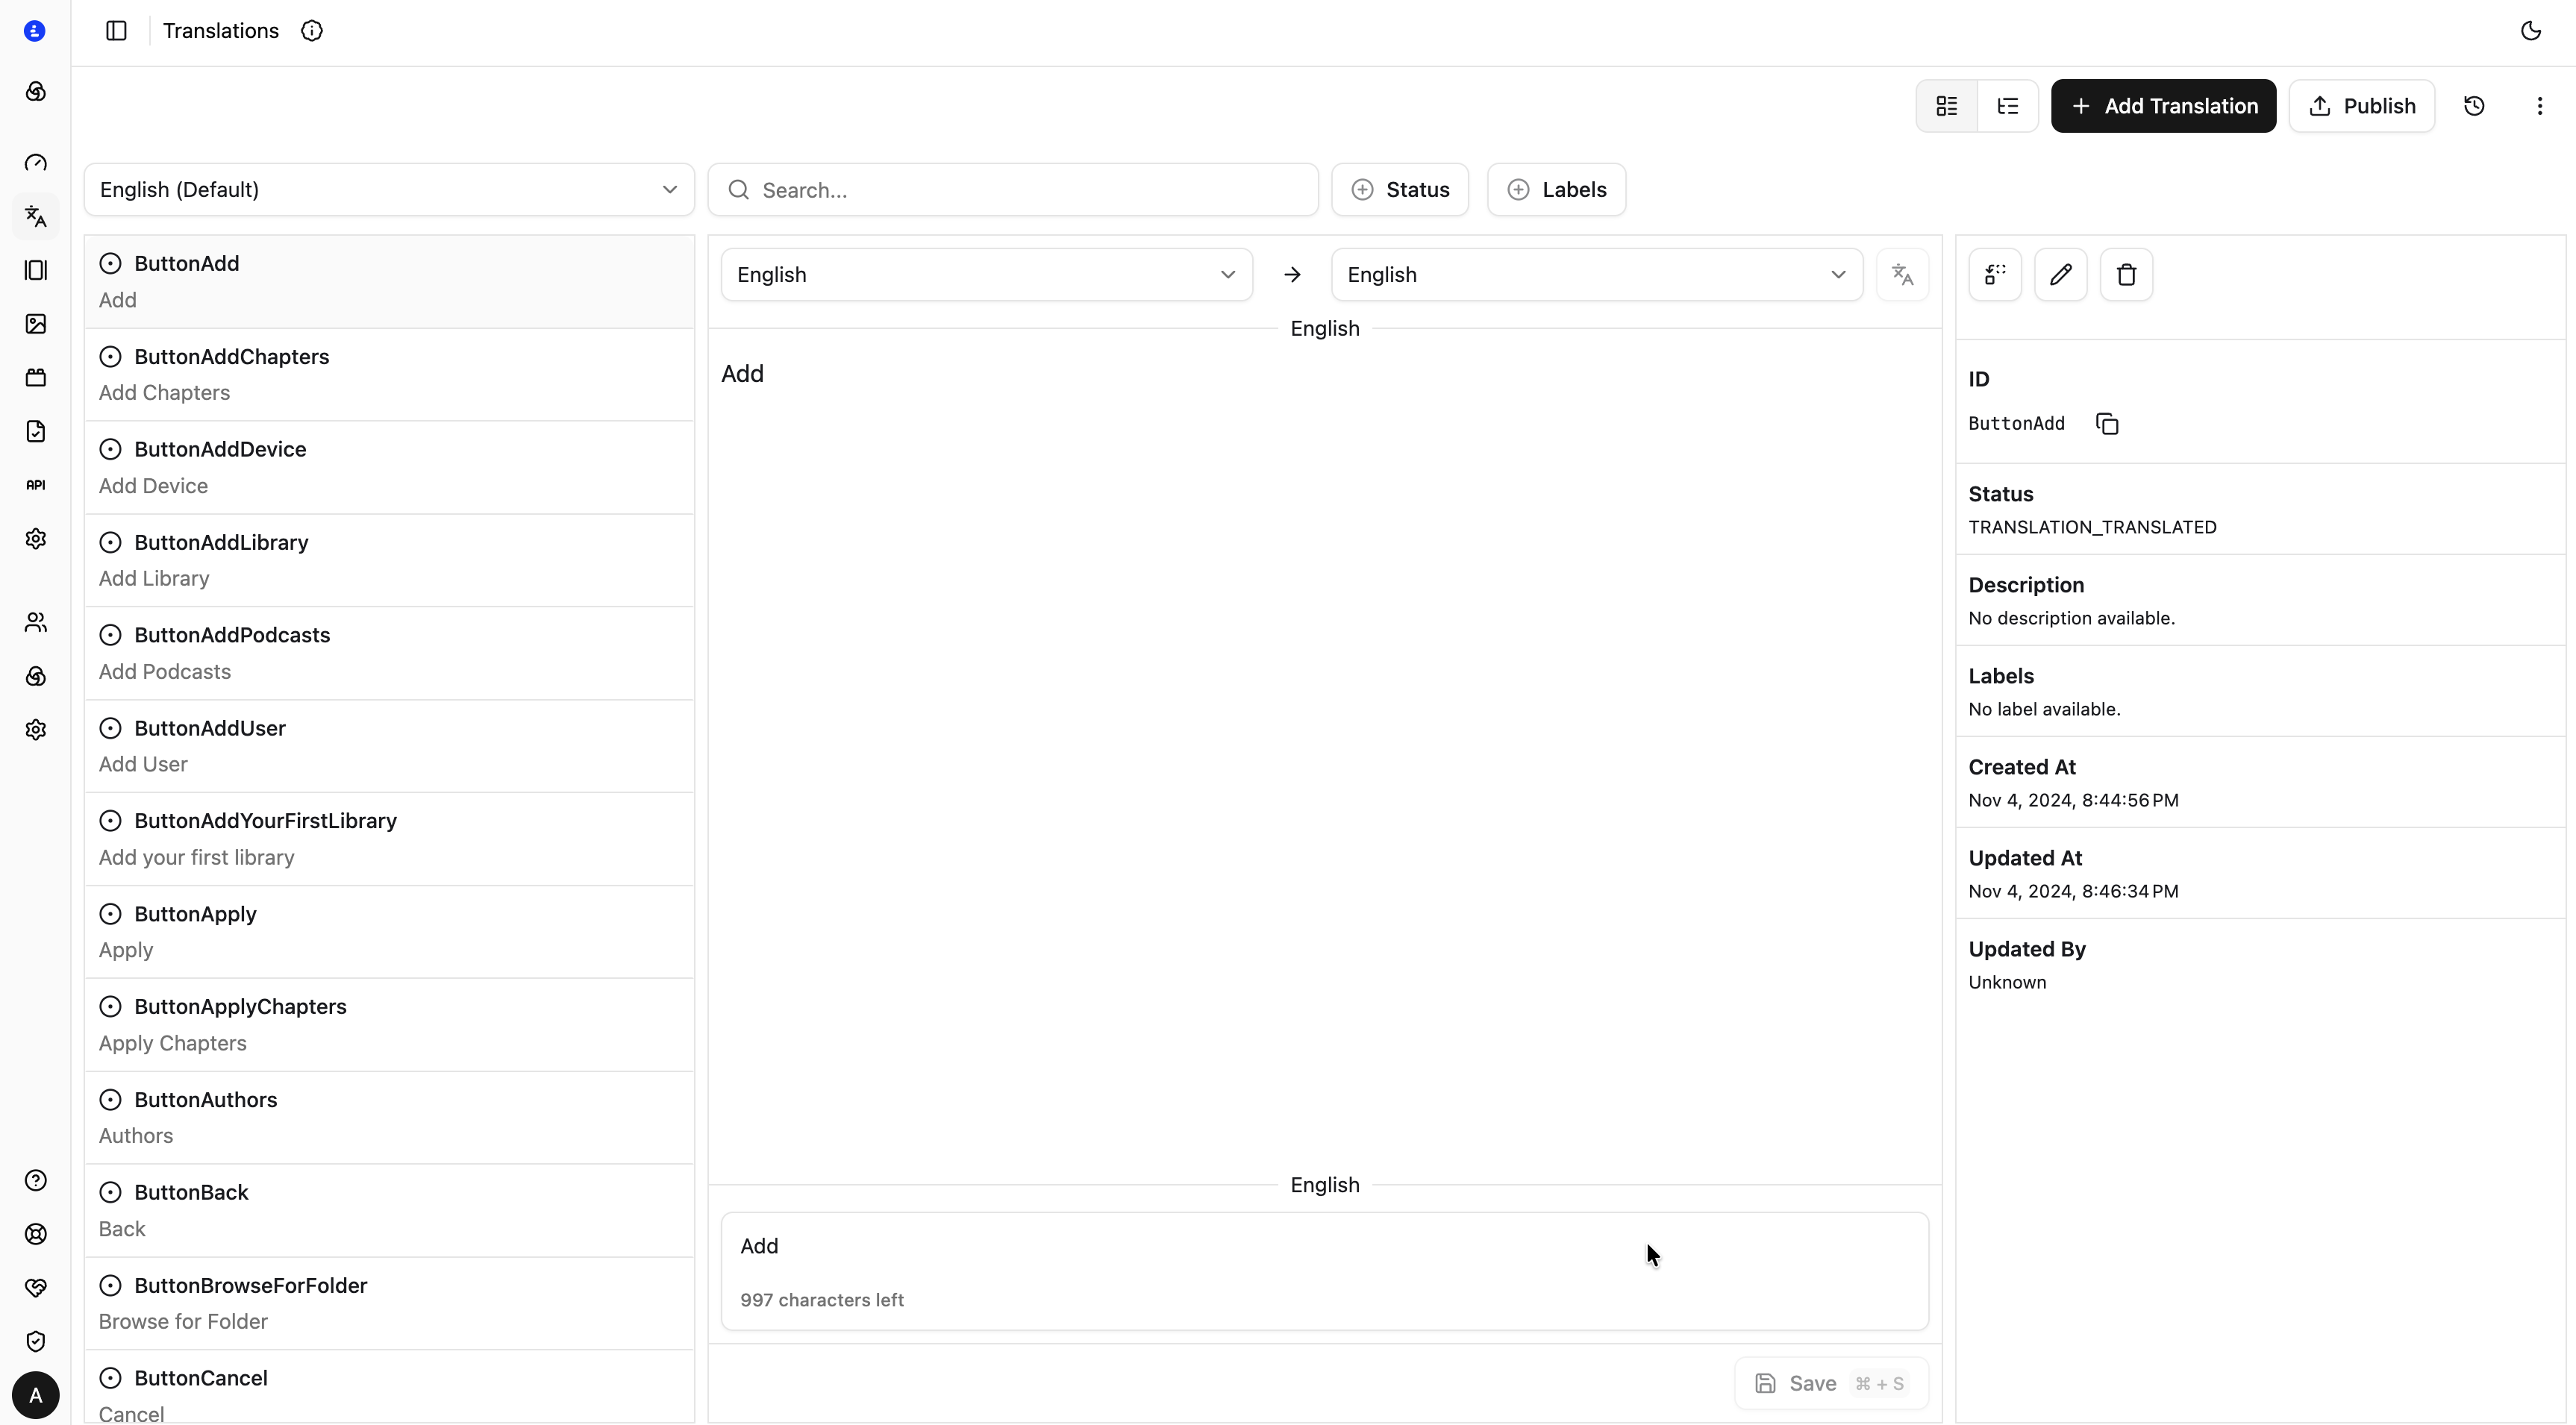
Navigate to Translations from the side menu. The screen is divided into three panels:
| Panel | Purpose |
|---|---|
| Left | Translation list, browsable by locale |
| Middle | Locale editor — translate from a source locale to a target locale |
| Right | Translation metadata — ID, status, labels, and timestamps |
Toolbar
The toolbar at the top right of the screen provides the main actions:
| Action | Description |
|---|---|
| + Add Translation | Create a new translation entry |
| Publish | Make all saved changes available via the API |
| Refresh | Reload the translation list |
| View toggle | Switch between list and grid view |
Filtering
Four controls let you narrow down the translation list:
| Control | Description |
|---|---|
| Locale dropdown | Shown at the top of the left panel — sets which locale's values are displayed in the list |
| Search | Filter translations by keyword |
| Status | Filter by translation completeness (see Translation Status) |
| Labels | Filter by one or more labels |
Add Translation
Click + Add Translation to open the creation form:
| Field | Required | Description |
|---|---|---|
| ID | ✅ | Unique key used in your application (e.g. common.submit). Cannot be changed after creation |
| Description | — | Optional note for translators — explains the context or usage of this string |
| Value | — | The string value for the default locale |
| Labels | — | One or more labels for grouping and filtering |
| Auto-translate | — | When enabled, Localess automatically requests translations for all other configured locales when the entry is created |
Editing Translations
Click any entry in the left panel to open it in the editor.
Middle panel — locale editor
- Select the Source Locale (the language you're translating from) in the left dropdown.
- Select the Target Locale (the language you're editing) in the right dropdown.
- The source locale value is displayed read-only in the upper text area.
- Type the translated value in the lower text area.
- Press Save or
⌘S/Ctrl+Sto save.
The character count below the target text area shows how many characters remain within the field limit.
Right panel — translation details
| Field | Description |
|---|---|
| ID | The unique translation key, with a copy button |
| Status | Computed translation completeness — see Translation Status |
| Description | The context note set at creation |
| Labels | Labels assigned to this translation |
| Created At | Timestamp of creation |
| Updated At | Timestamp of the last edit |
| Updated By | Name of the user who last edited this translation |
Use the edit (pencil) and delete (trash) action buttons in the right panel header to modify or remove the entry.
Translation Status
Translation status is computed automatically based on how many locales have a value for a given entry:
| Status | Description |
|---|---|
| Translation Translated | All configured locales have a value |
| Translation Partially Translated | Some locales have a value, others are missing |
| Translation Untranslated | No locale has a value yet |
Each locale within a translation also carries its own status:
| Status | Description |
|---|---|
| Locale Translated | This locale has a value |
| Locale Untranslated | This locale is missing a value |
Labels
Labels are free-form tags you can assign to translations to group related strings. Use them to:
- Filter the list down to a feature area (e.g.
navigation,errors,onboarding) - Coordinate translation work across team members
Labels are optional and do not affect the API output.
Publishing
Translations have two availability states:
| State | How to access via API |
|---|---|
| Saved (draft) | Available immediately with version=draft |
| Published | Available without specifying a version |
Click Publish to promote all saved changes to the published version. The toolbar indicator shows when there are unpublished changes pending.
This lets you stage translation work in progress and preview it in draft mode before making it available to production consumers.
Fetching Translations
Use the TypeScript SDK or REST API to fetch translations at runtime:
const translations = await client.getTranslations("en");
// { "common.submit": "Submit", "nav.home": "Home", ... }
Use the CLI to pull translations into local JSON files for use with file-based i18n libraries:
npx localess translations pull en --path ./locales/en.jsonLocalization
Localess provides two distinct localization capabilities — Translation Manager for UI strings and Content Translation for structured multilingual content.
Draft & Publish
Nothing goes live until you say so. Localess keeps every change in Draft until you explicitly promote it to Published — giving your team a safe staging buffer built into the CMS.